How to Tamp Espresso: The Ultimate Guide to Not Screwing It Up
Let’s talk about the most satisfying, yet most misunderstood, step in the espresso-making process: the tamp.
It feels like it should be simple. You put grounds in a basket, you push down. How hard could it be?
As it turns out, you can screw it up in about six different ways. An bad tamp is the silent killer of good espresso. It’s the reason for sour shots, channeling, and those mysterious pucks that look like they’ve been through a mudslide.
But fear not. We’re going to break down the art of tamping into a simple, foolproof process. No fancy gadgets required. Just you, a tamper, and a newfound sense of confidence.
What is Tamping, and Why Do We Even Do It?
Think of your coffee puck as a tiny, delicious roadblock. The job of the tamp is to pack the grounds evenly and tightly so that when the high-pressure water hits it, it has no choice but to seep through every particle of coffee equally.
A good tamp creates even resistance. This forces the water to spend the same amount of time with every coffee ground, extracting all the yummy sugars, oils, and flavors uniformly.
A bad tamp creates weak spots and channels. The water, being lazy, will find the path of least resistance. It will blast through those weak spots, over-extracting the coffee there (making it bitter) and completely under-extracting the rest (making it sour). The result is a confusing, terrible shot that tastes like regret.
The 4 Pillars of a Perfect Tamp
Master these four things, and you’ve mastered the tamp.
1. Pressure: It’s Not a Arm Wrestling Contest
The Goal: 30 pounds of pressure. That’s it.
The Myth: You need to Hulk-smash the grounds with all your might.
The Reality: After about 30 pounds, you’re just compressing the portafilter spring, not the coffee. You’re also risking wrist injury and an uneven surface.
How to find 30 lbs: It’s about the pressure of firmly pressing down on a kitchen scale. It’s a firm, confident push, not a violent one. If you’re worried, err on the side of too little—consistency is more important than brute force.
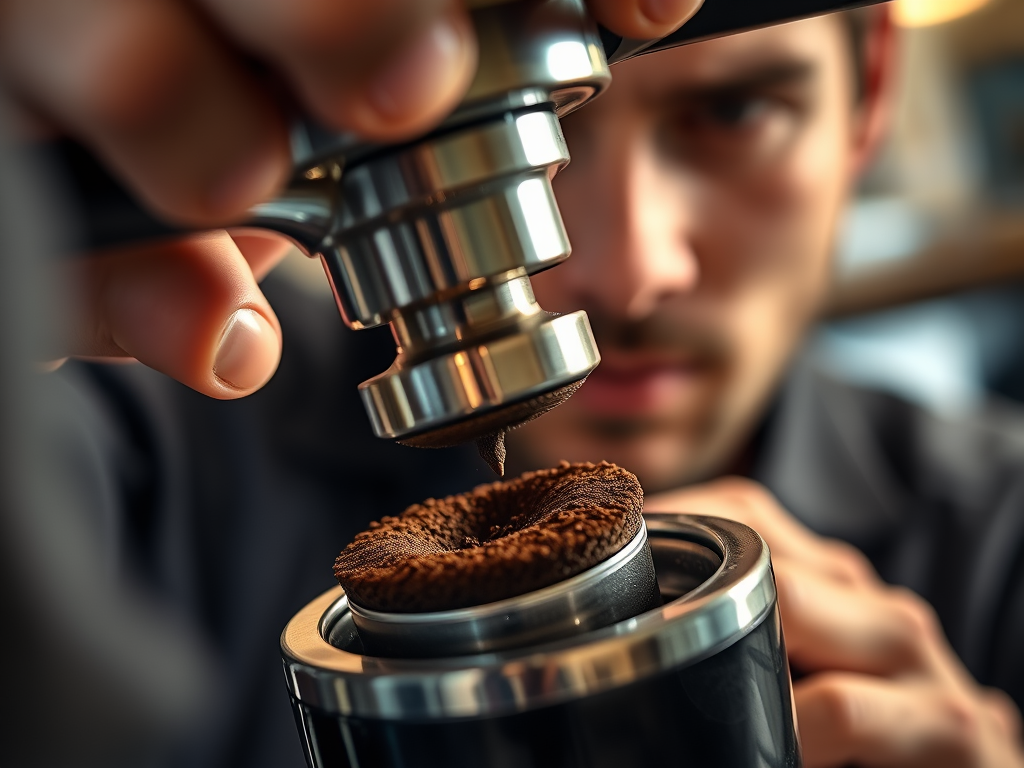
2. Levelness: This is the REAL Secret
The Goal: A perfectly level, even puck.
Why it matters: This is the most important factor. If your tamp is crooked, the water will flow faster through the shallower side and slower through the deeper side, leading to that awful uneven extraction.
How to do it: Rest your elbow on the counter for stability. Hold the tamper like a doorknob, not a dagger. Press straight down. When you’re done, give the tamper a slight polish—a gentle twist while it’s still seated to smooth out the top. Do NOT lift up and twist; that’s a great way to unseat the grounds.
3. Distribution: Before the Tamp
You can’t tamp uneven grounds into an even puck. Distribution is everything.
Before you even pick up the tamper, make sure the grounds are evenly spread in the portafilter. Tap the portafilter gently on the counter to settle them, or better yet, use a WDT tool (which can be a paperclip or a dedicated tool) to break up any clumps and distribute the grounds evenly.
4. Dryness: Keep It Clean
The Goal: A dry portafilter basket and a dry tamper.
Why: Wet grounds stick to the sides of the basket and the tamper. This creates a mess and pulls coffee away from the edges as you tamp, creating—you guessed it—uneven extraction and channeling.
The Step-by-Step Tamping Routine
- Grind into your portafilter.
- Distribute using a WDT tool or by tapping the portafilter to level the grounds.
- Place the portafilter on a stable, flat surface (your counter is perfect).
- Grip your tamper. Place it squarely on top of the coffee.
- Press straight down with firm, even pressure (aim for 30 lbs). You should feel the coffee push back.
- Polish with a gentle, slight twist to smooth the surface.
- Lift the tamper straight up and away. Admire your perfectly level coffee puck.
Common Tamping Mistakes to Avoid
- The Side Tamp: Pushing down at an angle. Guaranteed to make a lopsided puck.
- The Double Tamp: Tamping, lifting the tamper, and tamping again. This can fracture the puck and create channels.
- The Twist-of-Doom: Twisting while applying pressure. This shears the coffee puck, creating cracks.
- The Sloppy Setup: Tamping while holding the portafilter in the air. You have no stability. Always tamp on a flat, stable surface.
Do You Need a Calibrated Tamper?
A calibrated tamper has a spring that bottoms out at a specific pressure (e.g., 30 lbs). It’s a great training tool to teach your muscles what that pressure feels like. But once you have the feel for it, it’s not strictly necessary. A good, basic tamper that fits your basket snugly is all you need.
The Bottom Line: Consistency is King
The goal isn’t to achieve a mythical “perfect” tamp every single time. The goal is to achieve the exact same tamp every single time.
When your tamp is consistent, it removes one major variable from the espresso equation. If your shot tastes off, you know the problem is your grind size or dose—not your technique. And that makes dialing in your espresso infinitely easier.
Now go forth and tamp with confidence. You’ve got this.
Speaking of dialing in, a perfect tamp can’t fix a bad grind. [Make sure you’re starting with the right tool for the job with our guide to the best espresso grinders for beginners]The Best Espresso Grinders for Beginners in 2025 (No BS Guide)